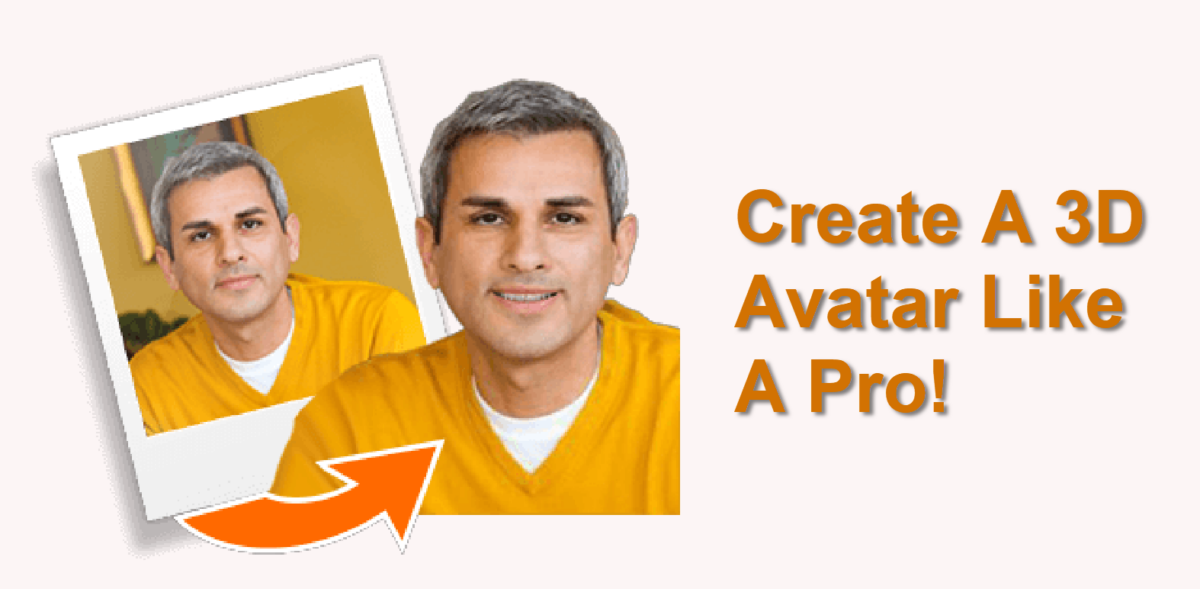
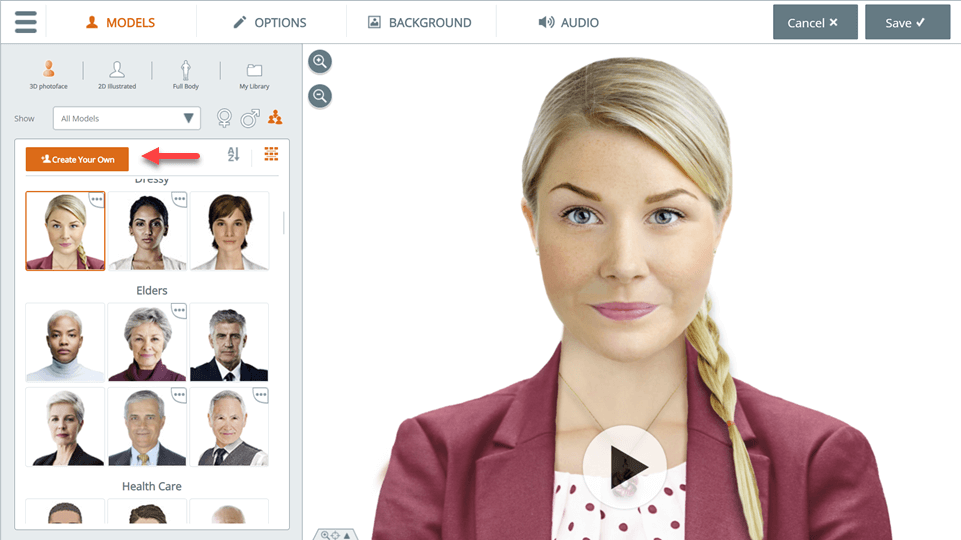
Photoface™ 3D is a SitePal® feature that enables you to create your own 3D character from a photo. To access this feature, open the SitePal Editor, and in the ‘Models’ tab click on ‘Create Your Own’.
In this post we would like to share best practices and tips that should help you make the most of this unique feature. Getting good results with Photoface 3D is partly due to optimal photo selection, and partly to acquired skill with the creation process. We will discuss both.
I. Photo Selection Tips
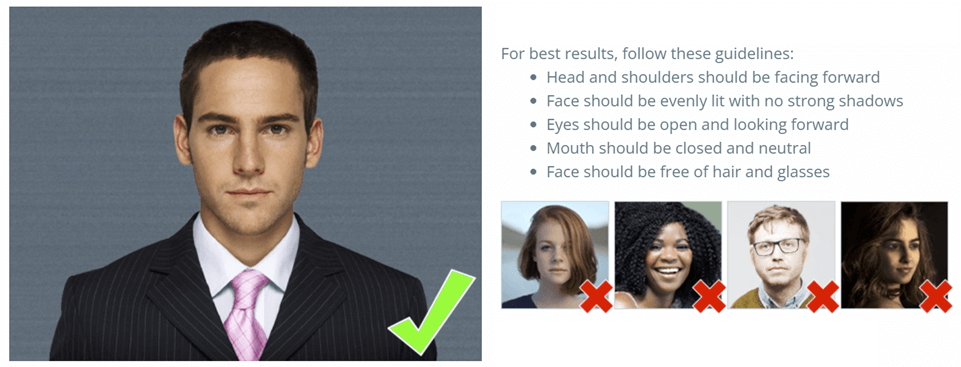
Your first rule – pick photos that meet our guidelines –
- Mouth closed (no teeth showing) – smile is ok
- Face looking forward, directly at the camera
- High quality, hi-resolution photo (more about this below)
- Evenly lit & in focus – no shadows on the face
- No eyeglasses, hair or other obstructions over the face. Facial hair should not be a problem.
High hair (a bun or Afro for example) can cause problems and should be avoided. Long flowing hair should not be a problem.
Optimal Resolution
So what is the right resolution to use?
Use a low resolution image – and your character may appear pixelated (grainy) when displayed on your web page. Use too high a resolution – and you’d be adding weight (download size) to your character unnecessarily.
The rule of thumb is roughly 1000 x 1000 pixels for the area immediately surrounding the face (while the photo itself may be larger). There is not much value to be gained by using a higher resolution, because on most screens it is unlikely that that these extra pixels will come into play. But if your implementation has unique viewing characteristics, do the math & decide for yourself.
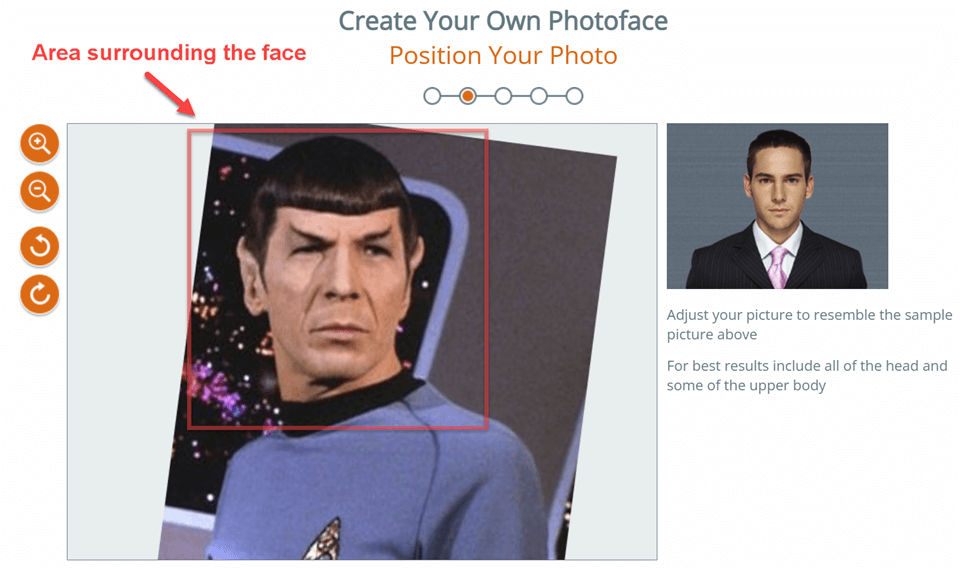
Image Composition
We suggest to use a photo that displays at least the upper part of the body, not just the head. For best results the body should be visible from below the chest & up. This will allow you to create a character with a large enough portion of the body, which will enable more flexibility when positioning on your web page.
Background – does it matter?
The Photoface 3D process does a pretty good job identifying the persons’ outline & auto-removing the background. But having a complex, noisy background can sometimes cause problems. While we do not require it, if you have the option we encourage the use of a uniform color background in your photo.
Pre-Edit the Image
Being fluent in Photoshop can be an advantage in certain cases. For example – a short neck (or no neck) photo can cause the shoulders to animate when the face moves. Sometimes that works well, and other times not so much. In those cases editing the photo by adding or extending the neck can help resolve.
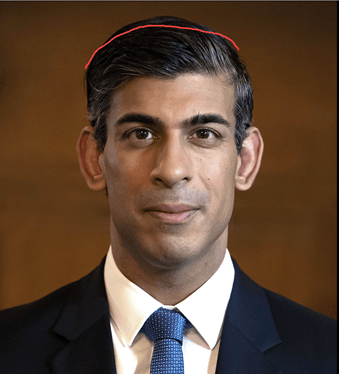
Another example is the so called “high hair” scenario. In some images, the face might be slightly inclined forward, resulting in the upper scalp occupying a bit more of the vertical length of the face than it normally would. This can result in visual problems when the Avatar animates. Sometimes it can be addressed by adjusting the Camera Angle setting (see below). But it can also be improved by trimming the upper scalp. This phenomena can exacerbated when the face shape is long and narrow.
Special Cases
Note that a photo may not work very well despite satisfying all requirements. Sometimes it is best to simply select a different photo. The opposite is also true – we sometimes see great results with faces that are off center, looking slightly sideways, or wearing eyeglasses.
Photoface 3D technology is optimized to the proportions of a “normal” human face. Faces with unusual proportions may not work very well. For example – an alien face with exceptional large or protruding eyes.
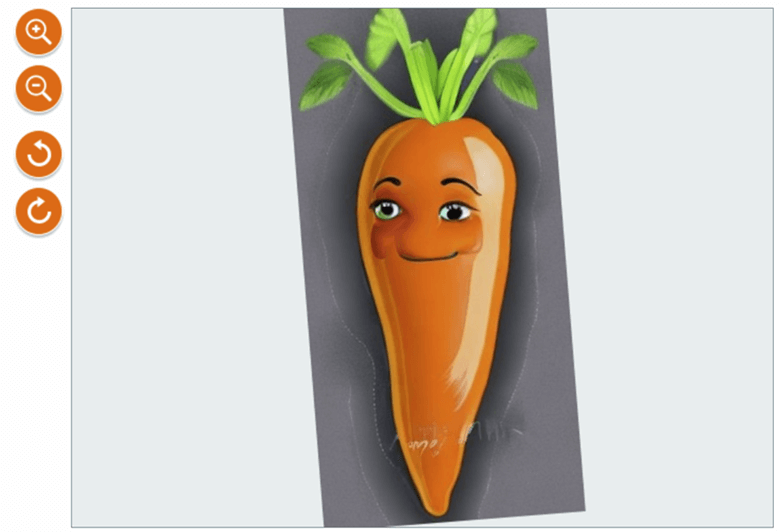
Despite that, we sometimes see customers achieve surprisingly good results with images of inanimate objects. A customer recently shared with us a very lovely “carrot face”, created by anthropomorphing an image of a carrot. We encourage you to use your imagination – but bear in mind that the tool was designed for human facial proportions.
II. The Photoface Editor – Suggestions & Tips
When you click on “Create Your Own” and initiate the Photoface process, there are 4 steps to go through:
1. Image upload & positioning
2. Anchor points placement
3. Masking the image
4. Finalizing your characters’ settings
Step 1 – Rotate & Scale
In the first step, your uploaded image is scaled and positioned automatically. Treat this initial positioning as a “first approximation”. It is up to you to fine-tune it.
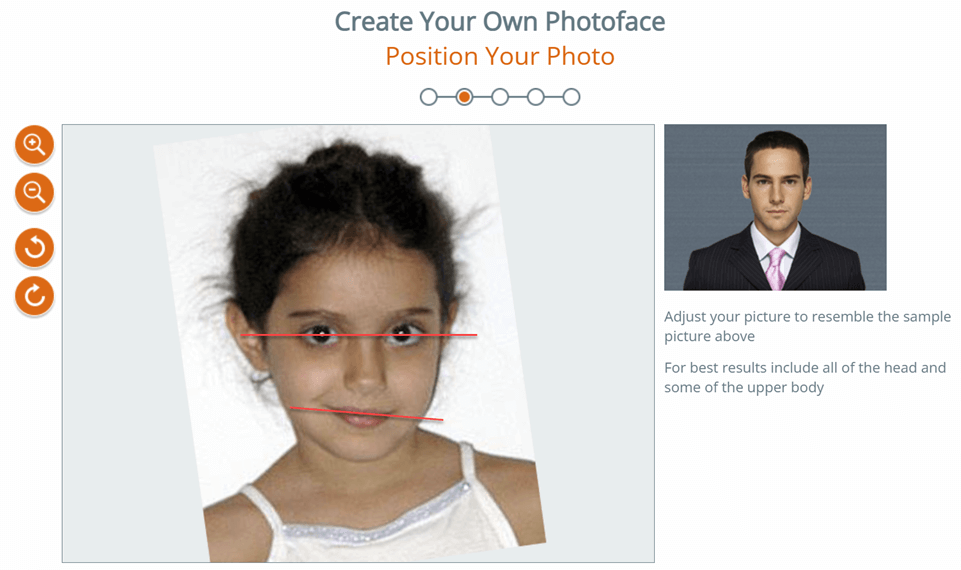
Rotation: be sure to position the face with the eyes horizontally aligned. In some photos the mouth and the “eye line” are not parallel – your priority should be to align the eyes. The mouth can be fine-tuned later.
Scale: As you position the photo in the frame, you may want to zoom out a bit, to allow more of the body into the frame. This positioning determines your final character’s visible extent. If the body is cut too short it may limit later positioning on your web page.
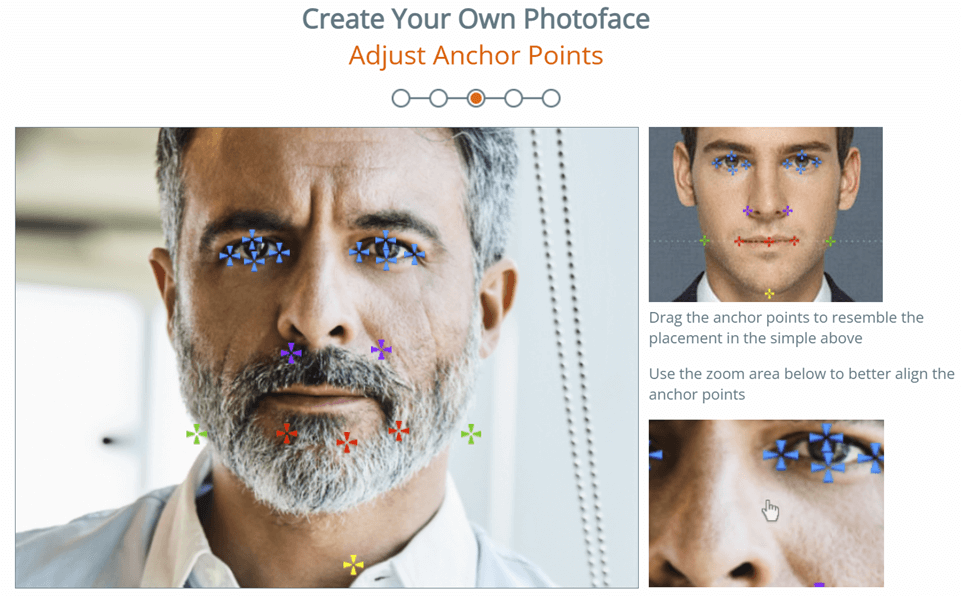
Step 2 – Anchor Point Placement
In the second step we auto-position the anchor points for you based on facial image analysis. This should also be considered an “initial approximation” for you to review and edit.
Follow the positioning in the sample picture & adjust the points carefully as needed. The auto-placement frequently requires manual fine-tuning.
Step 3 – Masking the Image
We recommend going with the deafult settings in this step, unless you have good reason not to. Automasking works well in most cases, and produces better results.
Step 4 – Final Settings
In the final step, detailed tools are provided to help you get the mouth just right. Try them out repeatedly, until you get a good feel for how each setting affects the result.
For example, you may need to extend the mouth slit – not too wide, and not too narrow, to enable the mouth to open naturally. You may need to position the mouth slit off center & play around with its curvature and vertical location. Faces are never symmetrical.
Check out the slider for teeth whiteness. Avoid teeth that are too bright – a good rule of thumb is to match the whites of the eyes in the photo.
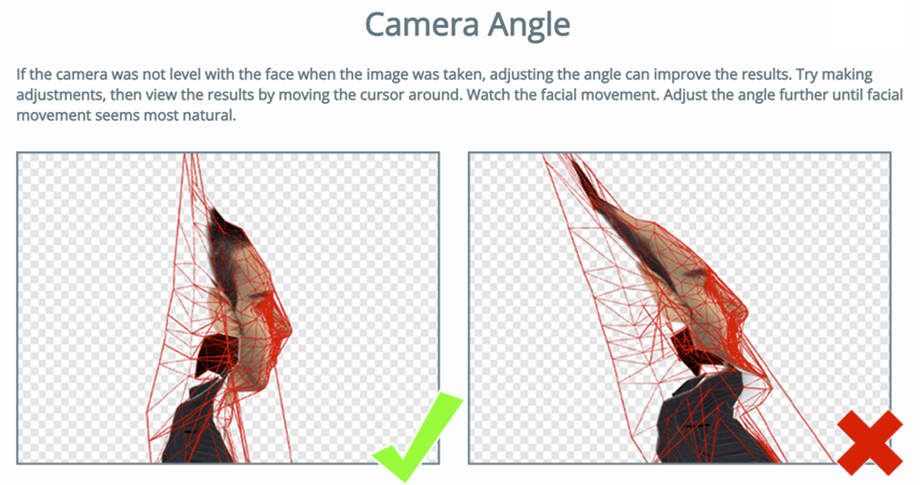
The “Camera Angle” setting can be very helpful. Play around with it to get a good feel for its effect.
Many times a face appears perfectly natural in the photo, and it is not immediately obvious that the photo was taken from slightly below the facial plain. This may cause the upper part of the head to stretch unnaturally as the head moves & can be a particular problem with naturally elongated faces.
Adjusting the camera angle can compensate & resolve.
Comments? Questions? Send us a note to: support@sitepal.com
